Finally Spring is here and we have definitely got in the seasonal spirit by starting our Easter crafting! Today's post has been such a joy to write and I can honestly say I have had the best couple of days crafting with these fun products from
ArtCuts.
Last Spring we featured ArtCuts in our
Easter crafting series and showed you some of the wooden decorations we had made. This year we are featuring them again because we think their products are absolutely fantastic. My main draw this year was the Easter wreath, which I first saw on their workshops page about a month ago. After seeing that the workshop kits had sold out, I waited patiently to see if the wreath would be released in their online store - and about 2 weeks ago it was!
Not being satisfied with just ordering the wreath, I also added a few other bits to my basket which I'll show you below...
Before I list the items I bought I just wanted to say that each item was beautifully packaged in tissue paper and little paper bags - I almost didn't want to open it!
All the pieces included in the Easter Wreath Set - One Sided
Wooden Bunnies
Wooden Easter Eggs
Mini Dotty Easter Egg Stamp
If the excitement of receiving my order wasn't enough, when I opened my parcel I was delighted to see a surprise of a free mini easter project.
I definitely couldn't wait to get started now! Primed with a beautiful sunny day as my backdrop, I headed on up to my craft room to get started.
I started with the Easter Wreath and began by inking the wreath with the Tea Leaves ink pad.
The colours I used in this project had been suggested by ArtCuts in the description of the Easter Wreath on their website.
I then used the picture of their wreath as a guide to help me colour the tulip flowers using a combination of the pink and yellow ink pads.
Once I had inked everything I then started to assemble the wreath and glued each element in place.
To hang my wreath I used some of the sage velvet ribbon included in my order.
A couple of things to point out:-
- for the mini easter eggs I used a different egg stamp to the one I ordered as it was too small for the egg embellishments. I used the
Folksy Easter Egg rubber stamp which we had bought previously from ArtCuts.
- for the wreath and most of the embellishments I applied the ink directly from the ink pad onto the wood and used a gentle motion to build up the colour. However when I inked around the bunny I decided to use a sponge dauber which was more gentle and easier to control.
- ArtCuts include plenty of embellishments for your wreath and I was left with a few left over which I used in my easter decorations.
I absolutely loved making this project and it was so relaxing and easy to put together. I can't wait to hang this up in my house!
Moving onto my easter decorations...
This is where I could really get creative and I will list below some of the extra materials and embellishments I used to create these:-
Mini Adhesive Pearls
Tim Holtz Distress Ink Pad - Picket Fence
To create my bunny decorations, I inked them on both sides using pink and white ink pads. I then used either the jasmine rubber stamp to stamp over the bunny or added a mini wooden daisy with a pearl on top.
For my Easter egg decorations, I used a range of products and techniques...
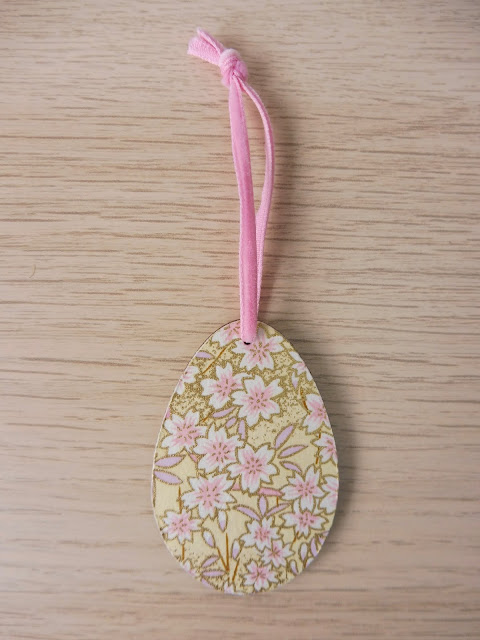
For my first egg decoration I used the Japanese Chiyogami paper (which we had bought previously from ArtCuts) and followed their
YouTube video on how to apply the paper. This is such a simple and effective way to cover your wooden decorations, and then you can match it up with a complimentary ribbon for hanging.
My second egg decoration was a bit more involved. To create the pink stripes across the egg I used some washi tape to mask off areas I didn't want the ink to apply to.
I then removed the washi tape to reveal the stripes.
To complete the design, I then used the jasmine flower and daisy rubber stamp across the stripes without ink. I also inked and added some mini wooden flowers across one of the stripes. To finish off the design I added some mini adhesive pearls.
For my third egg decoration I used some of the leftover embellishments from the wreath kit. For the background I used some pink ink and then stamped the daisy flower with green ink over the top.
I stamped the mini eggs with the Folksy egg stamp as before and then inked the small egg in pink, before adding a mini wooden daisy flower on top. I finished off the decoration by adding an adhesive pearl and some velvet ribbon.
Now, finally we can't forget about that free Easter project that was included in my order...
So for this decoration I inked the wooden circle with Aloe Vera and stamped the jasmine flower as a background in Tea Leaves. I then used Sunflower Yellow ink on the chick and added Pink Petunia ink to the mini heart embellishment. The heart did come with a fabric covering on one side, however it didn't match the design so I flipped it over and inked the back instead!
This has turned out to be one of my favourite decorations and it was included for free!
So that is my summary of all things
ArtCuts and Easter. We definitely recommend checking out
ArtCuts website for all things wooden shapes and embellishments. They have some fantastic designs and kits which are so easy and fun to put together. Also if you live in the South East of England, then make sure you make a visit to them once shops re-open! They often have little make and takes and run workshops on selected days so be sure to sign up to their email newsletter to be kept up to date.
I know I will definitely be paying a visit once restrictions are lifted!


