Showing posts sorted by relevance for query wedding series. Sort by date Show all posts

Thursday, 13 May 2021

Wedding Series 2: Save The Dates


Welcome to the start of a new Wedding Series on the blog, where we will be sharing some inspiration on lots of different wedding makes, including invitations, buttonholes, bouquets, table decorations, favours and more! This series will be split into two parts, with some posts in May and then the rest will be in November (after our wedding party - don't want to give away too many sneak peeks!) If you haven't already read our first Wedding Series on the blog, then make sure you check it out here. In the first series, I recapped a lot of wedding makes we created for my sister's wedding back in 2015.

So let's kick start this series with the Save The Dates...


So before I even got to the designing phase, I needed to come up with a theme for our wedding. The Save the Dates are an introduction to your wedding for your guests and are also a sneak peek into what the theme will be. We decided for our wedding that we wanted a beach/seaside theme which gave me plenty of scope to play with!

I often start researching ideas by looking on Pinterest and Etsy to see what kind of things I could come up with. We liked the idea of giving our guests something like a magnet or a badge that they could put up somewhere to remind them to "save the date".


In the end we decided to go for a magnet that our guests could put on their fridge (or anything magnetic). I played around with a few different ways of creating the magnet but in the end I ordered some clear plastic badges from Amazon and then simply took off the pin at the back and stuck a disc magnet on the back. The clear badges allow you to put your own design inside, so I therefore designed the text of the badge on the computer and cut them out using my Silhouette die cutting machine. I left enough room between "Tying the Knot" and the date at the bottom so that I could add a stamped image of a rope. I stamped this using a clear embossing ink and then used some gold embossing powder.


I designed the backing card in a similar way, by designing the text on the computer and then once printed out I added some stamped starfish and sand dollar designs to the top of the card and embossed them. Once they were all complete, I just used a small sticky dot on the back of the magnet to adhere to the card.


 Stay tuned this month for more wedding inspiration in this series, including invitations, bouquets and buttonholes...

Sunday, 7 June 2015

Wedding Series: Save the Dates & Invitations


Hi bloggers, today I am starting the Wedding Series on the blog, which will be a series of inspirational posts of different ideas and creations from both the Wedding and the Hen Party. So let's get started today with the Save the Dates and Wedding Invitations as that is a starting point for most couples once they have set a date.


For the Save the Date my sister wanted me to design a ticket postcard including the basic information (most importantly the date!) with a vintage style to the ticket. I designed the ticket on the computer and matched the size of the design to a ticket die cut (Memory Box) that I had in my craft stash which helped give the design its rounded corners with the punched out semi-circles on the side. If you don't have access to a die cut you could also use a circle punch and corner punch to create this effect. This design could also be enhanced with some extra aging effects by adding some distress ink or by roughing up the edges. The design could also be foiled as well if you have access to a foiling machine.

Now for the main invitation.....


The main invitation consisted of two parts:- the main card wrapped with doilies that outlined the essential details of the day including the names, date, time and venue details. This was also wrapped withe the RSVP tag. The second part of the invitation was a Pocket Envelope which included extra instructions, e.g. maps and directions, plus details on wedding gifts.


Once again I designed most of the invitation on the computer and used a doily die cut (Cheery Lynn) to wrap around the card.


I created the template for the pocket envelope on the computer and printed it on textured Kraft cardstock. I also designed the maps on the computer as well, including small icons to denote the wedding venue and parking facilities. Designing your own maps can be fiddly but I recommend using the pen function on your design software and trace over a map to get the basic shape right and then add arrows and instructions to clarify how to get from A to B. I also included a 3x4 card with instructions on Wedding Gifts. Since Joanne and Ben already live together and have most of the household items they need they wanted to request a contribution to their honeymoon - therefore we came up with a little ditty that instructed guests perfectly........

"We know its traditional to write a list,
But in this case there is a slight twist,
Our house is styled nice and pretty,
So we ask you donate to the honeymoon kitty,
But the most important thing to say,
Is that you are there to celebrate our day"

There are lots of websites to help you write such poems as the one above and in this case we used a combination of poems to come up with this one. The two lines in the middle are our own though - which we are quite proud of!

Making your own invitations can be quite time consuming but it is very rewarding and I think it is one of those occasions where we all want to get creative. It can also be an effective way of keeping costs down especially if you are on a budget. 
That being said I have been thinking about venturing into the Wedding Invitation industry so if you have liked what you have seen in this blog post, please feel free to get in touch and I would happily give you a quote for designing some wedding invitations for you, whether that be just Save the Date cards or main invitations or to talk about ideas.

Stay tuned on the blog for more posts in the Wedding Series including Hen Party ideas, venue decorations, bouquet design and more!


Saturday, 4 July 2015

Wedding Series: Bouquets & Buttonholes


Hi bloggers, today we are back to the Wedding series and this post is all about the bouquets and buttonholes. My very talented mother made these beautiful bouquets and also the buttonholes - for the whole wedding party I may just add. So she definitely had her work cut out for her but it was definitely worth it all in the end.

So let's start with the bride's bouquet......

 These bouquets were made using a faux stem bouquet, therefore making them look like real flowers at a glance with the stems sticking out at the bottom. Mum used silk ribbon to form each flower, using bead stamens to fill each one and then pinning them into the polysterene ball at the top of the bouquet. The stems were wrapped with burlap and burlap was also added as padding underneath the flowers. Finally a bit of fine millinery netting was added for extra sophistication.


A few special details were also attached to the bride's bouquet....


A picture of our dad was placed in this beautiful vintage locket and attached to the bouquet to signify his presence in spirit on the day. This is such a sentimental detail to add and is a beautiful idea to include loved ones that couldn't be there on the day.


The other side of the bouquet featured the laced up detail and also the bride's 'something borrowed' and 'something old' using my mum's wishbone charm.


To keep with the Parisian theme, my mum added three Eiffel Tower charms to the bouquet.


When we arrived at the Wedding venue the bouquets were placed in these kilner jars that were decorated with burlap and a doily to match the other table center pieces.

So let's have a look at the bridesmaids bouquet (mine).....


My bouquet featured the same style flowers with some pink ones mixed in to match my dress.


Making your own bouquets definitely has its advantages, one of the main ones being that you can keep it forever as a memento from the wedding day. Obviously it comes down to personal preference but if you can make flowers that look as realistic as this you on to a winner!

Now onto the buttonholes......


The buttonholes were made using the same style flower as the bouquets with an added silk leaf, using silk ribbon to wrap round the pin acting as a stem for the flower.


As I mentioned above, everyone who attended the wedding were given a buttonhole which is a beautiful way to include everyone and is also a lovely memento for them to take home with them as a reminder of the wedding day.

Mum also made a few bracelets using the same flowers which my mum and the groom's mum wore to the wedding instead of the buttonhole.....


To finish, I will leave you with a picture of the wedding guests wearing their buttonholes proudly!


 Only a few more posts left to go in the Wedding Series so make sure you stay tuned for the cake design, thank you cards and also inspiration for making a wedding card if you're attending a wedding anytime soon.


Thursday, 31 December 2015

Our Year in Review


Hi bloggers, I can't believe 2015 is almost over and what a year it's been, 6 workshops, a wedding, St Ives Craft Retreat, a Christmas Craft Party, two amazing Christmas craft fairs and we can't forget meeting the queen of altered art.....Wendy Vecchi! We really feel like we have achieved something this year and progressed further than ever before so we can't wait to see what 2016 brings us!

In this last post of 2015 we want to remind you of all these great moments and we will include links to the relevant blog posts if you've missed out at any point throughout the year.

So let's start with our 6 workshops from 2015:-


Wow, six fantastic workshops and I don't even think we could possibly pick a favourite as they were so much fun to design and teach! Let us know which was your favourite.....

Handmade Wedding

So at the beginning of the year not only did we need to think of new workshop ideas but we also had to start planning for my sister's wedding as last Christmas they finally announced the date of their wedding..... 3rd June 2015. Collectively we designed invitations, decorations, bouquets and more. To take a look back at our handmade wedding, take a look at our Wedding Series from June and July.


Make Art with Wendy Vecchi

 Another massive highlight from this year has to be meeting Wendy Vecchi in London for her 'Make Art' workshop. What an amazing and talented woman! This experience goes right up there with when we met Tim Holtz back in 2011 and was a pure pleasure. Take a look back at our day on the blog here.

St. Ives Craft Retreat


So this has to be the main highlight and biggest achievement from 2015. We finally organised our first ever Craft Retreat and in what better place than sunny St. Ives. In terms of weather, we had the perfect week and I think our guests probably thought the same of our projects and accommodation. We organised two main projects and then also a couple of evening projects as well. Add some shopping, food and laughter and it made the perfect getaway. Same again next year?? (We're already making plans!)

Click below to review the fun we had:-


Christmas Craft Party

So by the time December rolled around we were looking back at an amazing year and we wanted to celebrate with our crafters and thank them for all their support throughout the year and coming back to our workshops again and again. So what better way to celebrate then with a Christmas Craft Party.

Take a look at the fun that was had here.... 

12 Days of Christmas 2015

We finished off the year with our 12 Days of Christmas, including some wonderful decoration and home decor ideas. If you missed our countdown to Christmas, take a look back here.

Thank you to everyone that has supported us this year by attending our workshops, buying our handmade items at craft fairs and also all your lovely comments and emails. We are truly thankful and know that we wouldn't be able to do what we do without all of you.

Happy New Year Everyone! Bring on 2016!


Monday, 13 July 2015

Wedding Series: Thank You Cards


Hi bloggers, today is the penultimate post in our Wedding Series and it's all about the thank you cards.

Even after the wedding is all over and done with there are still a few loose ends to tie up. Of course the main thing being getting those precious photos developed or waiting to see a preview of the photos from the photographer. Next thing to think about is the thank you cards so you can thank all those close friends and family for being a part of your special day.


In keeping with the vintage theme of the wedding I decided to design a postcard style for my sister's thank you cards with a photo of the happy couple on the front of the card. A photo thank you card is an excellent way of sending a photo memento to guests so as to avoid the many emails asking for a picture of the bride and groom!


The back of the postcard featured a vintage postcard design including the thank you message from the bride and groom. The right side of the postcard was left blank so that it could either be addressed and sent in the post as a postcard or they could choose to simply write the recipient's names and place the card in an envelope.

 So only one more post left in the Wedding Series which will provide you with two wedding card examples to use as inspiration if you fancy making a handmade card for an upcoming wedding.


Wednesday, 24 June 2015

Wedding Series: Afternoon Tea Reception


Hi bloggers, so this is the fourth post of the Wedding Series and today we are moving onto the Wedding Reception Venue and all the pretty little details. So let's start with the venue itself......

Venue: The Talbot Inn, Cuckfield, Sussex

We came across this venue for the wedding completely by chance. On the way back from a visit to a local craft shop we were driving through the village of Cuckfield and noticed The Talbot Inn with its beautiful outside dining area and clocked a small function room above the pub that turned out to be a new extension for the pub. As soon as we got back we started researching the pub and found their Facebook page which showed recent events that had been hosted in the function room, so we were straight on the phone to my sister and arranged a viewing for the next weekend, when we fell completely in love with the place!

Outside dining area with the upstairs function room in the backdrop.

As you walk through the door there are a set of stairs that lead up to the function room, keeping it separate from the pub.

So let's see what we had to work with.....


We arranged for the venue to provide tablecloths and the china needed for the afternoon tea while we provided the pretty little details. As you may be able to see in the photo the venue had some lovely 'lightbulb' lights and also some fairy lights wrapped around the beams which added some lovely detail in terms of lighting.


We decided to deck the place out with doily bunting, keeping in theme with the wedding invitations. I have to say this is also a really cheap way of making a large amount of bunting as all you need is some twine and a couple of different sizes of doilies.


 Flowers were the perfect accent to decorate tables and ledges around the venue. We used tin cans and Kilner jars to put the flowers in decorated with some burlap, doilies and twine. We sourced flowers from a local supermarket and became florists for the day by making our own arrangements to fill the jars and cans. To keep the bunches of flowers together we used tiny elastic bands around the stalks of the flowers to stop any drooping over the edge.

Top table with the flowers as a backdrop.


For the table centre pieces we used tin cans to put the flowers in, placed on top of some vintage books. We included a vintage Paris postcard sitting next to a table number designed to look like a postcard. Guests were only assigned to a table, leaving them to choose what seat they took. For that extra vintage touch we attached the table numbers to a plain thread spool.


Instead of a guest book my sister wanted to use these feedback cards to place on the tables for guests to give their feedback and advice for the happy couple. The cards were sourced from Marks & Spencer and we bought a box of small pencils from eBay.


Keeping in with the theme of the Afternoon Tea my sister decided to give tea bags as a favor. Herself and Ben chose two of their favourite blends of tea and I designed a pocket envelope for them to go in that included an appropriate quote with the date of the day for the guests to keep as a keepsake from the wedding day. I have to say the quote was not my own - I was inspired by Pinterest!


As guests entered the venue and walked up the steps they were greeted with some more flowers - this time in the form of a large pot plant that had a sign for Joanne & Ben's Wedding reception pointing the way for guests to follow......


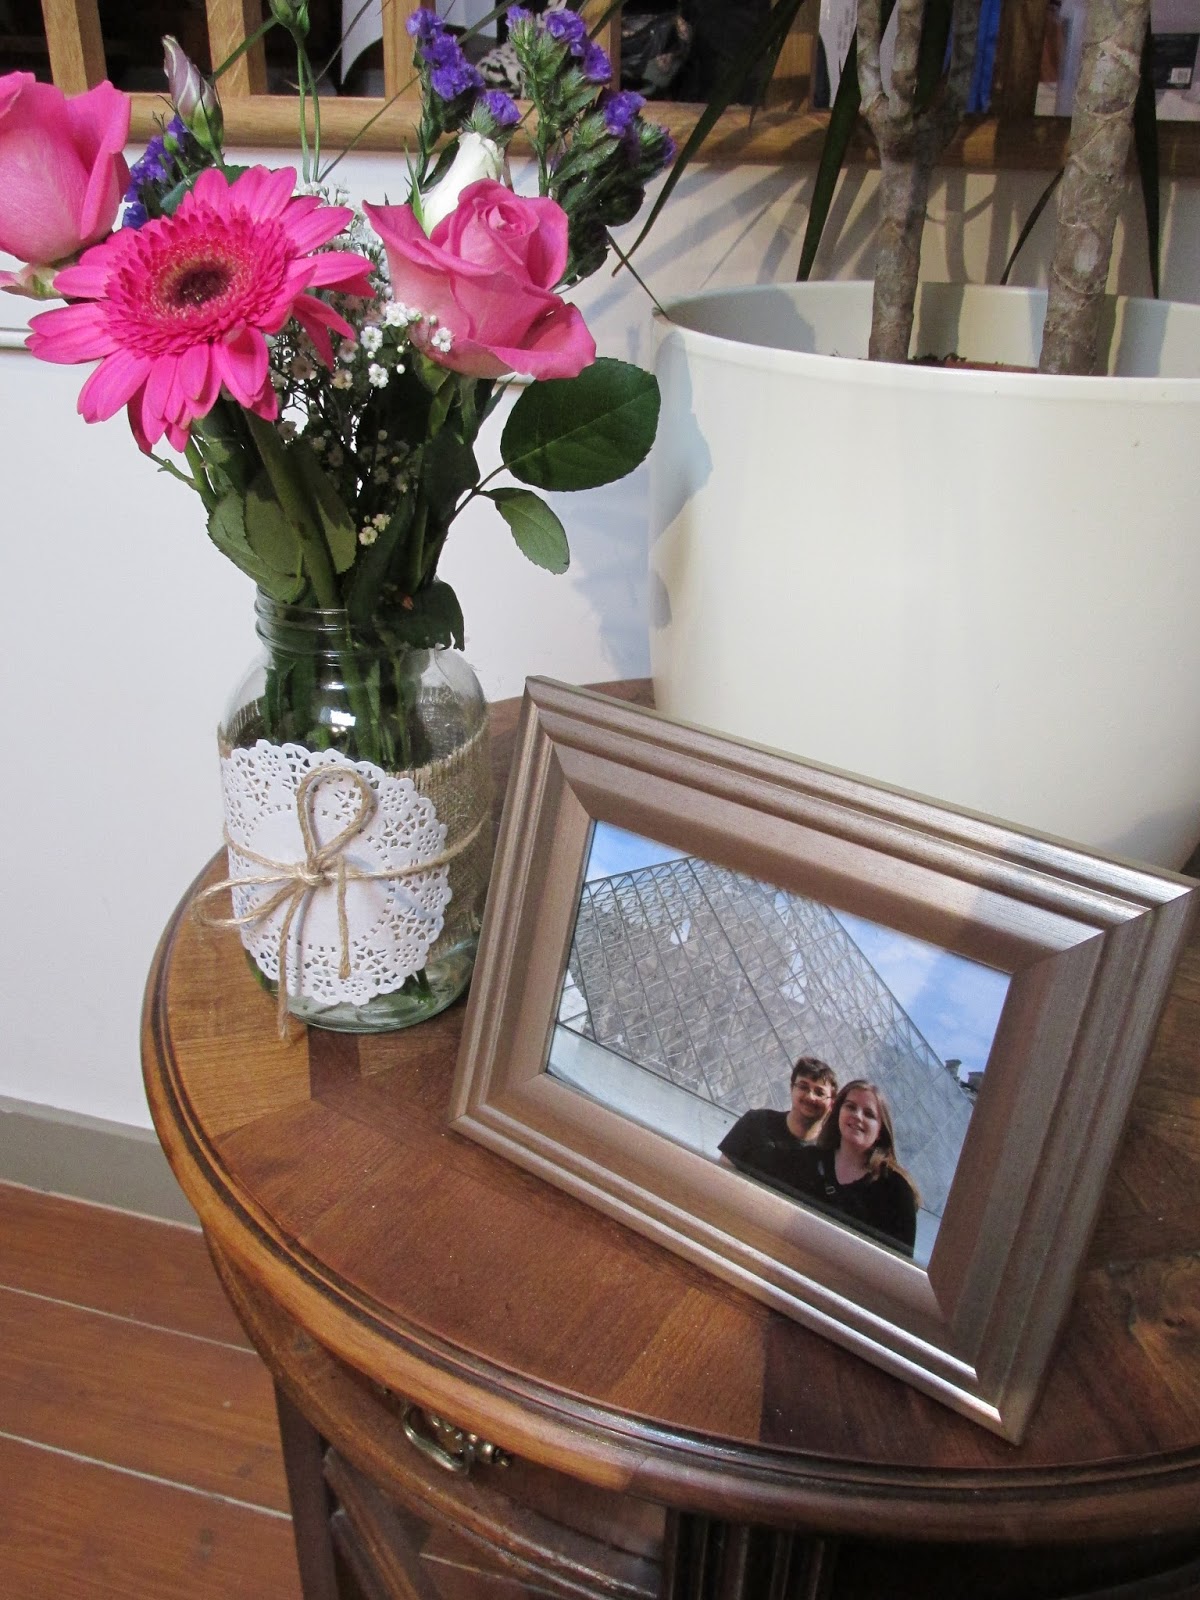
We also made use of the table on the stairway adding some more flowers and a picture of Joanne & Ben from their Paris trip - where Ben proposed - which also explains the use of Paris postcards as part of the table centre pieces.
 

Once guests made it upstairs they were greeted with a glass of bubbly and came across the table that had a vintage suitcase on for guests to place their cards and gifts in. We lined the case with a vintage doily and included pictures of their parents wedding days. We cut out the word 'Cards' from glitter card using a die cutting machine and pegged the letters to some pink ribbon going across the back pocket of the suitcase.


The table plan was made from a large frame that we covered the insert of the frame with padding and burlap to pin the luggage tags onto.

All these pretty little details came together to provide the perfect setting for an afternoon tea wedding reception. Make sure you check back for the last few posts in this Wedding Series covering bouquets, buttonholes and thank you cards. 

I will leave you with one photo of the happy couple speaking to guests as they enjoy their afternoon tea..........